Key Takeaways
- Silicone sleeve debossing usually needs a 0.3-0.8 mm mold depth to read cleanly without weakening the sleeve
- A 60-70 Shore A silicone sleeve gives the best balance of grip, recovery, and logo clarity
- MOQ for custom silicone-sleeve drinkware in our Zhejiang factory is typically 3,000 units, with 25-35 days lead time
- Debossed logos outperform printed logos on abrasion because the mark is formed into the material, not sitting on top
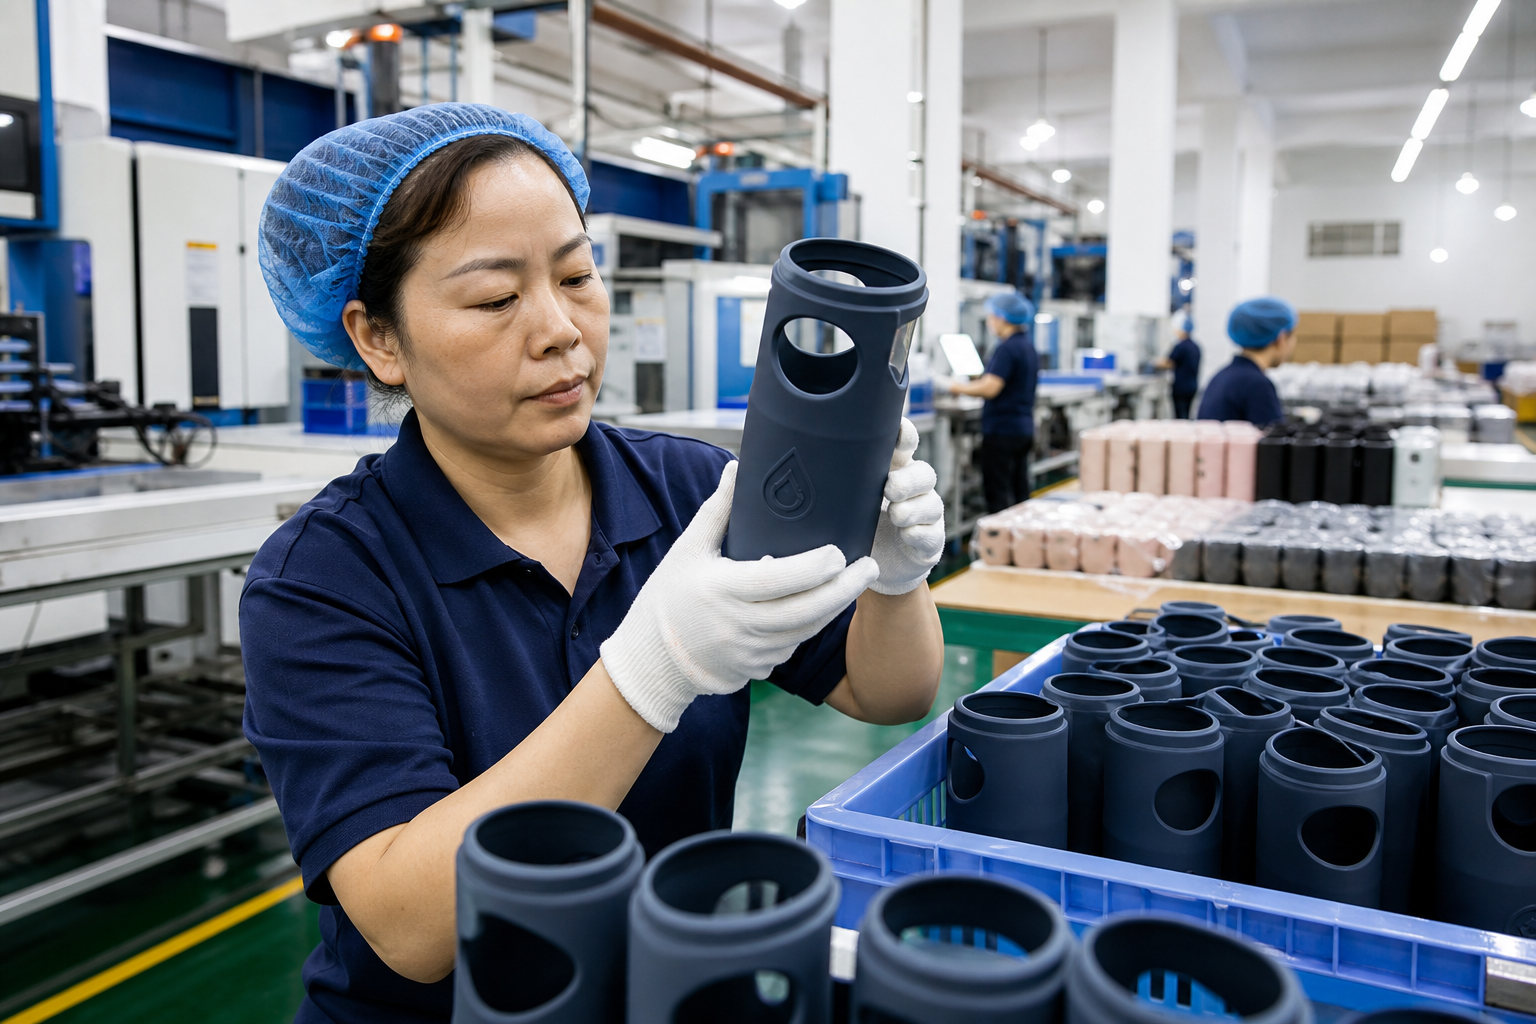
If you are building a wellness brand, “eco-looking” is not enough. Buyers want a silicone bottle sleeve that feels solid in hand, survives daily use, and still gives a clean logo story. That is where silicone sleeve debossing gets the job. It is quieter than a full-color print, tougher than a surface ink job, and fits minimalist brands that sell texture as much as color. We run a 0.6 mm deboss depth on the line for a lot of sleeve orders, and the buyer usually notices that first.
We see this a lot in Zhejiang and across China: founders ask for sustainability, then find out the decoration has to carry most of the perceived value. The math does not work any other way. A tactile finish does that work with a proper mold, a durometer in the right range, and wall design that keeps the logo readable after molding. QC pulled the sample after 200 wash cycles and the mark still held, which is why we push back when someone says “just make it look premium” without giving us the mold spec.
Why debossing feels premium
Silicone sleeve debossing works because the eye reads clean lines and the hand feels the depth. That mix sells well with wellness buyers. They want a calm product story: no heavy coating, no busy print, just a better grip and a cleaner shelf look. A debossed mark gives that without looking cheap.
On the line, the practical side is obvious. We ship a lot of silicone sleeves with 500 pcs MOQ, and a printed logo can scuff, grab oil, or fade after a few dishwasher cycles. Once we cut the logo into the mold, the mark is part of the part itself. QC pulled a sample last week and the printed version showed shine loss after 12 washes; the debossed one stayed sharp. That is why this finish holds up better and shoots better under soft light.
For brand owners, the real question is not “Can you make it?” It is “Can you keep it readable at scale?” This is the wrong question to ask if the artwork is too fine. We need detail control. A clean debossed logo usually needs at least 0.4 mm stroke width, and text below 5 mm in height gets risky unless the shape is bold. We had a buyer flag a PO typo once—5 mm became 3 mm—and the math did not work. In Zhejiang, where mold shops and silicone lines sit 20 minutes apart, we can usually tune that faster than a split supply chain can.
Practical rule: if your logo looks good in grayscale at 25 mm wide, it usually survives debossing better than a detailed full-color mark.
Debossed vs embossed marks
People mix up debossed and embossed decoration all the time, but the difference matters on the line. An embossed logo stands proud of the surface. Silicone sleeve debossing pushes the mark inward. For sleeves, we usually prefer debossing because the artwork stays better protected from scuffing and the surface is easier to wipe clean. No sharp peaks either, so it feels better in the hand.
There is another reason we push debossing for sustainable drinkware: it looks quieter. Wellness buyers usually want calm, not a sales poster. A recessed mark does that on its own. We can still build contrast by coloring the silicone body itself, but the mark stays low. If a buyer wants stronger shelf pop, a raised mark can work, though dust sits along the edges and the result looks louder. One brand asked for a raised logo on a 1.8 mm sleeve, then flagged the first sample because it looked busy. Fair point.
Typical mold geometry is straightforward:
- Deboss depth: 0.3-0.8 mm
- Minimum line width: 0.4-0.6 mm
- Safe corner radius: 0.2 mm or larger
- Recommended sleeve wall thickness: 1.8-2.5 mm
We usually run two sample rounds before mass production. Round one checks legibility with the steel ruler on the bench. Round two checks whether the logo still looks premium after stretching, flash trimming, and 24-hour compression recovery. QC pulled the sample at 0.5 mm depth once because the corners softened too much after cure. That is standard export work in China, and it saves you from shipping a nice-looking sample that fails in real use.
Choosing the right silicone
Silicone is not one material. We see first-time buyers waste a week or two here. For a silicone bottle sleeve, 60-70 Shore A is the range we run most often. Softer than that, the sleeve turns gummy and the debossed edge loses definition. Harder than that, grip drops off, and the bottle feels awkward on a desk or in a gym bag.
Food-contact compliance and odor need to be checked early. For EU and North American orders, we usually spec platinum-cured or properly post-cured silicone with low volatile content. If the sleeve comes off the line with a strong smell, the buyer flags it right away. For Europe, REACH and a signed declaration of conformity are standard. For the U.S., many buyers ask for FDA food-contact material support, and some want CA Prop 65 review based on their sales channel. This is the wrong question to ask at the last minute.
Thickness matters as much as hardness. A 2.0 mm sleeve at 65 Shore A usually keeps the logo edges clean and still flexes for bottle insertion and removal. Go thicker, and the debossed area can look swollen. Go thinner, and the mark can warp under squeeze pressure. In our Hangzhou shop, we match logo depth, durometer, and bottle diameter before cut steel; changing those after the tool is cut is slower and the math does not work. QC pulled the sample on a 500 ml bottle and the edge blur showed up at 1.6 mm.
If you are building a premium line, ask for:
- Silicone hardness report
- Odor test after post-curing
- Dishwasher durability data, ideally 200 cycles
- Compression recovery test after 24 hours
Mood-board directions that sell
Start with the mood board before tooling. That is how we keep the finish premium and avoid wasting a mold trial. For wellness brands, the strongest silicone sleeve debossing concepts usually sit on muted, nature-led colors and simple geometry. Oat, clay, sage, stone, charcoal, dusty blue. Skip neon and metallic effects. The tactile surface does the work; color should back it up.
We usually see three directions that sell:
Calm clinical
Run matte white or soft gray sleeves with a clean recessed wordmark. This works for hydration brands, supplements, and yoga accessories. Keep the logo centered and spaced out. Thin script is a bad bet; once it hits the mold, it can close up. We had a buyer flag a 7 mm script on a PO last season, and QC pulled the sample before the line ran it.
Earth-first retail
Use sand, olive, terracotta, or moss with a deeper deboss. The look feels handmade, but it still needs control. It pairs well with cork, recycled paper, and kraft cartons. A 1-color embossed logo can look crowded here; a debossed mark reads cleaner and feels more credible. If the buyer pushes for a louder logo, I’d say that is the wrong question to ask.
Desk-to-gym minimal
Use dark slate or smoke tones with a shallow deboss that catches side light. This is the safe pick when the bottle has to look sharp in product photos and still sit on an office desk. Keep the mark large and clean, usually 18-30 mm wide depending on sleeve diameter. We run 22 mm a lot on a 65 mm sleeve, and the math works.
In China, we build sample boards with silicone chips, Pantone references, and logo depth callouts. Digital mockups lie. Silicone takes light differently from hard plastic, so the same artwork can look flat on screen and sharp on the bench. If your buyer is retail-focused, ask for a physical board before sign-off. We ship those with a 0.3 mm depth note, and it cuts down on back-and-forth fast.
Tooling, MOQ, and lead time
For custom silicone sleeve projects, tooling is the first cash decision. A simple debossed logo mold usually runs USD 120-350, depending on cavity count, logo depth, and whether we are matching an existing bottle body. If the sleeve itself is custom-shaped, the mold price goes up fast because the line has to hold shape after curing and trimming.
Our Zhejiang factory usually runs MOQ 3,000 units for custom silicone sleeves. If the change is only color and the bottle body is already tooled, we can sometimes go lower. Lead time is 25-35 days after sample approval and deposit, if the artwork is final and the compliance file is clean. We ship about 180,000 sleeve-based drinkware units a month. That number matters when a buyer is lining up an Amazon FBA replenishment or a hard launch date. Once a buyer flagged a PO typo on “sillicone” and lost two days. Small error, real delay.
Revisions cost money. A logo change from thin text to a bolder mark is cheap before steel is cut and painful after. The math does not work the other way. We ask for a 2D drawing, a 3D render, and one physical sample before mass tooling. QC pulled the sample with a caliper at 0.8 mm wall thickness, and that is where issues show up. This is the wrong question to ask: “Can we fix it later?” Later usually means scrap.
For landed cost planning, a typical silicone sleeve adds about USD 0.35-1.10 per set, depending on size, sleeve thickness, and packaging. If you want individually boxed retail packs with barcode labels, add another USD 0.12-0.28 per unit. A plain white carton and a printed insert are not the same thing, and the buyer notices the difference at receiving. Those are not pretty numbers, but they protect margin.
How to inspect production quality
Silicone sleeve debossing is only premium when the line is clean. We check for blurred edges, depth drift, flash at the mold line, dust, and color shift between batches. “Looks okay” is not a quality standard. Set the inspection method before we run the first shot.
For export shipments, we normally use AQL 2.5 for major defects and AQL 4.0 for minor defects on decoration and appearance, though some premium programs ask for tighter internal limits. The debossed area should be checked under 500-700 lux with side lighting, because overhead lights hide shallow logo cuts. On one 60 mm sleeve job, QC pulled the sample and the buyer flagged a 0.3 mm depth gap that we could not see from the top.
Three control points matter most:
- Pre-production sample to lock color, depth, and logo position
- First article inspection for the first 50-100 units off the line
- Final random inspection before carton sealing and palletizing
Ask for photos of the mold cavity, the cured sleeve, and the finished set. If the supplier cannot show tooling and output in the same batch record, that is a red flag. We keep those shots because overseas buyers want traceability, and a PO typo on the logo code can turn into a 12-day rework instead of an 18-day shipment. If you sell through retail chains or Amazon, traceability is not optional. It is what lets you answer complaints without guessing.
A premium tactile finish should also pass a simple rub check. If the brand mark turns glossy, sticky, or distorted after a few cleaning cycles, the compound is off or the cure is incomplete. We’ve seen this go sideways on soft-touch sleeves, and the math does not work for a wellness brand, because the customer feels the defect before they read the box.
Get a debossed sample that feels right
Send your logo, sleeve diameter, and target market. We will quote tooling, MOQ, and lead time from Hangzhou with no guesswork.
Frequently asked questions
How deep should a silicone sleeve debossing be?
For most wellness-brand drinkware, 0.3-0.8 mm is the useful range. Below 0.3 mm, the mark can disappear in soft lighting or after slight sleeve compression. Above 0.8 mm, the logo may look too aggressive or distort the sleeve wall. We usually start at 0.5 mm for a clean tactile finish. If your artwork has thin text, keep the depth closer to 0.4-0.5 mm and widen the strokes to at least 0.4 mm. For larger sleeve diameters, a deeper mark can work, but only if the wall thickness is 1.8 mm or more.
Is a debossed logo more durable than printing?
Yes, usually. A debossed logo is part of the silicone surface, so it does not abrade the way ink does. On a properly post-cured sleeve, you can expect the logo to survive 200 dishwasher cycles far better than a surface print. The real risks are poor mold quality, weak artwork, or silicone that is too soft, such as below 50 Shore A. For retail programs, we still recommend a rub test, a dishwash test, and a compression test before mass approval.
What MOQ should I expect for custom silicone sleeve drinkware?
In our Zhejiang factory, a typical MOQ is 3,000 units for custom silicone sleeve projects. If you are only changing sleeve color and using an existing bottle body, you may sometimes start lower, but true custom debossing generally needs enough volume to justify tooling and setup. Lead time is usually 25-35 days after sample approval. If you need retail packaging, barcode labels, or FBA prep, add a few extra days for packing and carton verification.
Can silicone sleeve debossing work with small logos?
It can, but you need to simplify. Small text below 5 mm high is risky, especially if the lines are thin or the corners are sharp. A logo width of 18-25 mm is usually safer on a standard bottle sleeve, and strokes should be at least 0.4 mm. If your mark is complex, we often suggest converting it into a stronger icon or wordmark before tooling. A clean, bold embossed logo concept usually transfers better than a detailed print logo.
What compliance documents should I ask for?
For Europe, ask for REACH compliance, a declaration of conformity, and material traceability. For North America, buyers often request FDA food-contact support, plus any state-specific screening if they sell through retail or marketplaces. If you are using the product in wellness channels, you should also ask about odor testing and post-curing data. For batch control, request inspection records, AQL results, and a production photo set. In China, a serious supplier should be able to provide these without hesitation.